A little bit of history
Bead embroidery is a type of beadwork that uses a needle and thread to stitch beads to a fabric, suede, or leather surface.
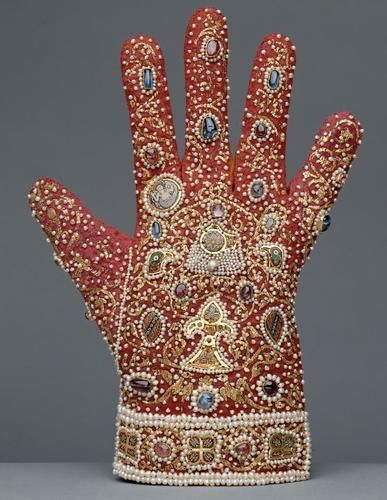
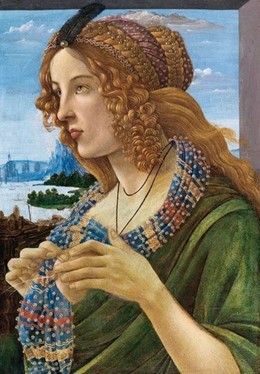
Below are just some small amount of examples from medieval Europe where beadwork can be found.

Standard techniques
Although we do not have much information on the exact techniques that masters used back in the day, we can use visual proof analysis, like on saved pieces or portraits, and guess how the beads were attached to the surface. Thankfully, the bead usually has only two holes, and there are not as many methods to attach to the surface efficiently.
Stitches
Running stitch
Yes. Just a running stitch when you put beads on it. This will let you keep a bigger distance between beads.
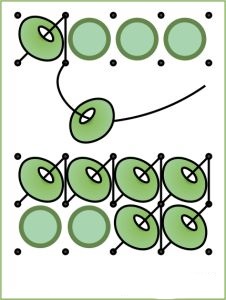
The “monastic” stitch (works perfectly with canvas).
If you have crossed stitch before, this one is easy for you. The idea is to put the bead in the “square”. The thread goes from one corner to the one across, and the bead sits diagonally, “crossing” the thread.
For each stitch on the front side, one bead is sewn, a diagonal stitch is made, and the thread goes to the underside close to the bead. On the other side, a vertical stitch is made, the thread goes back to the front side, and another diagonal stitch with a bead is made. Thus, diagonal stitches with beads strung on them are obtained from the front side, and stitches are vertical from the wrong side.
Important to remember if your thread goes left to right or right to left in case you need to provide an even pattern.
Beads end up on the perfect angle, parallel to each other, as long as you keep the same “square sizes.”
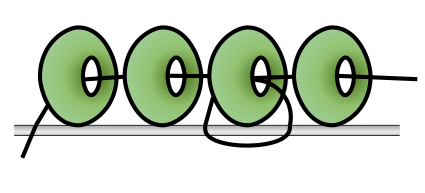
“String” stitch.
Another way to get beads in one line one by one, but with no or minimal incline. Great to use when the line is not straight. I usually run the needle through all the beads once the line is complete to add some sturdiness and to correct all the “errors” or uneven places.
To make a stitch, you basically make a loop, so the fabric surface and the bead is ending up inside the loop. It may look like the run-back stitch but with a bead on it. The trick is to return the needle bead wide from the last one.

“Stem” stitch.
Probably the one I use the most in my work. If you look at the pattern, it is the same idea as string stitch, but upside down. You should start with two beads, run needs on the wrong side, return needs between two beads, and run it through the last. The embroidery will live forever (well, for a long time with proper use).

“Arched” stitch.
Just like a stem stitch but with more beads in between loops. The embroidery is usually less ridged and can be used for long straightish lines.
Little tips
YOU:
- Wash your hands
- Take breaks for your arms and eyes every 30-45 minutes.
- If you have low blood pressure or bad blood flow in your limbs, wear special gloves as you work.
BEADS:
- Draw your design on fabric or paper that is easy to rip off after the embroidery is complete.
- Beads the line of beads shall be sewn under the same incline.
- The element of the main drawing should be in the center of the embroidery and be stood by the decoration.
- The size and the form of the beads must be the same unless required by the design.
- The embroidery cloth must be tightened very hard. Therefore tapestry frames or hoops are used.
- Silk threads shall be waxed before you proceed with embroidery. So is cotton. If you use Japanese nylon, no vax is needed.
- The thread color must match the canvas color or beads color.
And, the last advice – play around. Experiment. Take your favorite embroidery stitch and add beads to it. Learn from your mistakes, and see what you like the most.
